Wednesday, September 30, 2009

pin cushion!

You saw the block in its state post machine work, here's how the rest of the project went.


After sewing down all the triangles.


You can't see it in this view, but I left one edge of the cube open, for stuffing and for ease of manuevering with the hand-sewing.


This is what it looked like once I started pinning and stitching down the window panes.


Ready for stuffing!


Stuffed and ready for stitching.


I closed up that opening with a running stitch and then put the last window pane in. Through the process, I realized that it might have not been too difficult to have done all the initial machine joins but one, stuffed the cube, and then machine-stitched the last opening closed. Doing the hand stitching on the stuffed cube wouldn't have been quite as easy as on the unstuffed cube, but it wouldn't have been that much extra effort.


The finished product!


So it's actually quite big for a pincushion. And I do worry that going through so many layers of fabric will dull the straight pins. I might end up using it as a 'thing' purely for decoration rather than as a pincushion, but we'll see. Mainly, I wanted to see how a cathedral window cube would go. I like it. Sometimes success is easy!

Monday, September 28, 2009

excuse the cat butt

I spend many a Saturday in the spring and fall months helping my parents set up shop at small town festivals. They have a nursery, of the plant variety, and though plants are not often when you find at fests, it's a good way to not only make money, but advertise. They always insist on paying me for my time, though I always tell them they don't need to and that I would do it out of the goodness of my heart. I not only love my parents, I like them and I enjoy the time I get to spend hanging out with them.

This past weekend, I had joked that for the first time, I would not only accept pay without arguing, but that I would request it in quarters, for laundry. As it turns out, I took my pay in fat quarters. Ha! I just thought of that just now and am exceedingly proud of the corny joke. I'll share it with my dad later as he's the one that taught me the art of the corny joke.

In any case, Dad took a look around after we got all the plants arranged and came back telling me about a booth that had quilting stuff for sale. He actually described it as, "You know, material, like this folded (hand gesture of size), you know, uh, fabric. Fabric!" I surmised that he meant fat quarters from his hand gestures, but assumed that the fabric wouldn't be anything much interesting--there is occasionally someone selling fabric alongside their crafts at these things and it's generally cheap cotton of non-interesting designs. I said I'd go look but wasn't too hopeful.

So, imagine my surprise when I did walk over later and noticed quite a few Aunt Grace patterns laying on the table. When the woman behind the table told me that the fat quarters were only $1 each, I told her I'd be right back. I also told Dad that $20 would be more than enough money when I asked for some cash. Only one of those statements was true. I could have spent $40.


So much pretty!


(And yes, excuse the cat butt, Sissie was intent on 'helping' me sew yesterday. She makes a great paperweight.)

Thursday, September 24, 2009

a thing in process

So I have this habit wherein I get into the middle of a sewing project and feel like I can't work on anything else until that one is done. I have all the pieces cut out for that wacky polka-dotted shirt dress but didn't feel like actually sewing it last night--the fabric is a slippery rayon which will no fun. It will be worth it in the end, but it will be a pain in the butt to get to the end. Since I have those pieces ready to go though, I feel like that's what I should be working on and so I generally don't allow myself any other projects. It's a habit that I need to get out of judging by the number of projects on my to-do list. It wouldn't be the best idea to start another piece of clothing, but why not smaller things?

So, after washing dishes and doing some vacuuming and sweeping last night, I threw this together.


It's not done yet, I hope you realize that. When it is done, it will be a block/pin cushion made out of cathedral window squares. I'm looking forward to seeing how it turns out--the window panes, in a dark brown, will wrap the edges of the squares, which I think would seem unexpected to most people.

Monday, September 21, 2009

7 years in the making

This project literally took me nearly 7 years. It's one of those things where you're afraid to try it, but then once you do, you want to smack yourself upside the head because it was ridiculously easy, you just had to sit down and do it.

When I first moved to Atlanta in August of 2002, I had a very post-college hodge-podge of furniture. I had two chairs in the living room, one of which was something I inherited from a friend who got it in her post-college years from another friend. I wanted a sofa but needed something cheap and flexible for small apartments. I felt lucky when I found this cute little rattan set.

Except that the cushions were covered in an ugly 1960s print barkcloth. I don't have a photo--it wasn't even worth documenting. There wasn't even a bit of kitchsy cuteness, they were just ugly. I thought to myself, oh, I can make new cushions, no problem! Foam and nice fabric are expensive of course, so I figured I would just cover the ugly cushions in something cheap until I could afford to do the real project. So I bought some clearance sheets.


The sofas sat in this state for 6 years, including through a move from Atlanta to Austin. 6 years. I could never decide on fabric, I was too intimidated by the whole thing, etc.

Finally, I told myself I just needed to do it. I did the bottom cushion about a year ago. I discovered that, since I cut out things like piping (which would be nice but perhaps a bigger challenge than necessary on a $60 sofa), it was really pretty easy and didn't take much time at all to do. But it still took me a year to get around to doing the back cushions.

I finally finished those this weekend, along with new throw pillows*, and even hand repair work to my vintage throw pillows!


*The throw pillows are a garage sale find velvet on one side and the same satin finish home dec polyester on the reverse. I only had enough velvet to do one side for each of 4 pillows. Sewing together velvet and a heavy satin finish fabric is not fun, let me tell you that. Pain in the rear. But it's great to have the project finally done. Now I can move onto another of those things that I've been procrastinating on.

Tuesday, September 8, 2009

inspired by heather

Some oldies, but goodies that I was inspired to post after reading Heather's post about a ring-bearer pillow.

It was interesting that in a fairly short period of time after moving back to Austin, I got asked to do two projects that involved cutting apart a wedding dress. I admit it, there's something satisfying in that for the perpetually single gal. But they were great challenges too.

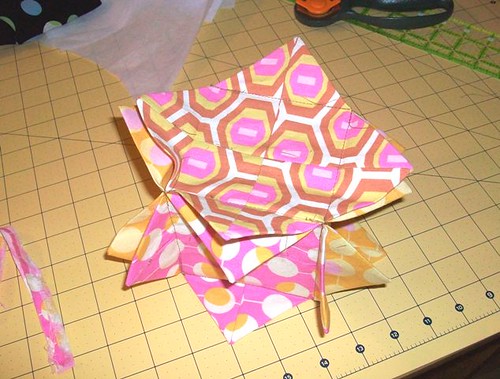
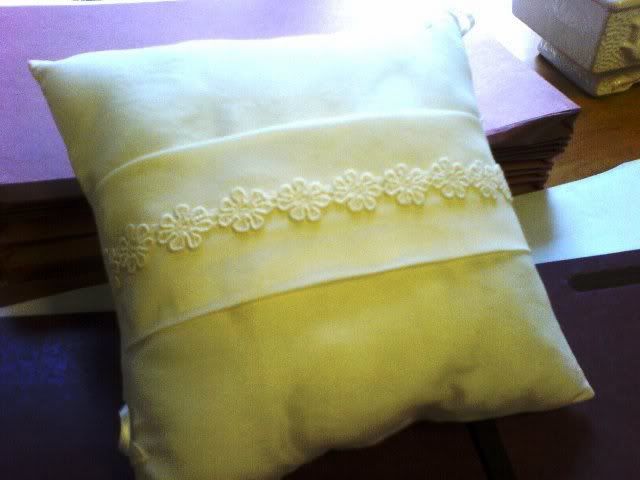
The wedding dress dated to the early 1980s and wasn't made out of the nicest of polyester satins. We worked up a plan that consisted of purchasing new silk satin for the base fabric of the pillow, and layering that with the sheer overlay fabric from the dress and artfully arranging lace details from the train.


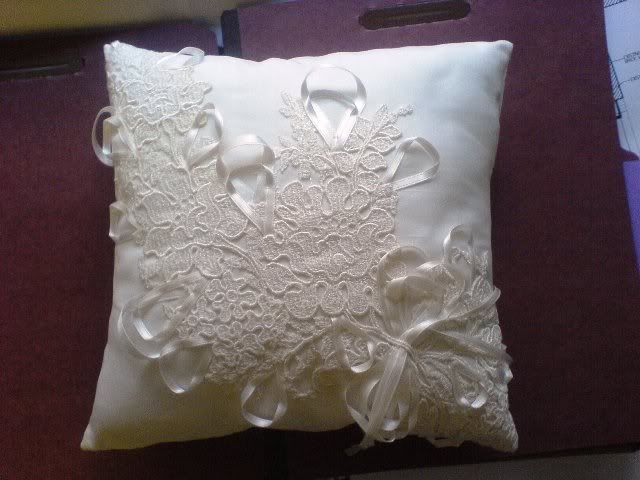
The lace, of course, was all hand-stitched down, with the addition of the decorative ribbons to make the tie ribbons not stick out quite so much.


This lace was the edging off the train and incorporated just into the holder of the pillow. I was pretty touched to be asked to work on this project and was very pleased with the outcome.


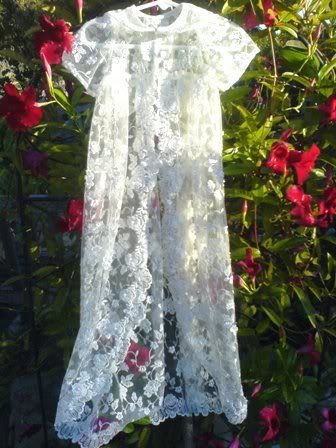
Sometime after that, one of my college roommates asked me about making a Christening Gown for her using her wedding dress. This gown was another with a satin base under a lace overlayer. The idea behind the basic design was to have a satin dress that wasn't too frilly, with a lace coat that could be worn over it. Their first child is a girl, but anticipating possible future boys in the family, she wanted something that could be used for all the children without being overly gender-oriented either way.


My friend shared with me links for newly made gowns that she liked and so between those, a Simplicity pattern and my mom's Martha Pullen book (we used to watch her PBS show religiously and drool over the antique laces), I cobbled together this pattern.


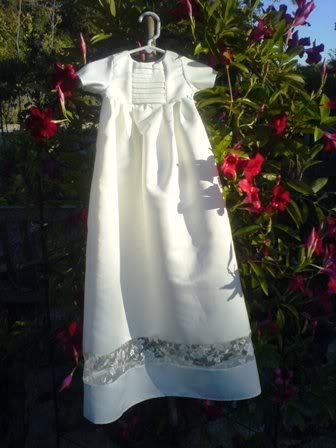
It was a challenge. As big as a wedding dress skirt may seem, it's not that big when you're trying to make a long, very full skirt for a Christening gown. I went through a very experimental muslin process to ensure that I had enough satin to get some fullness. I opted for the pleats rather than the gathering to meet that gender-neutral feel, but also because the satin was thick and wouldn't have cooperated that well with gathering.


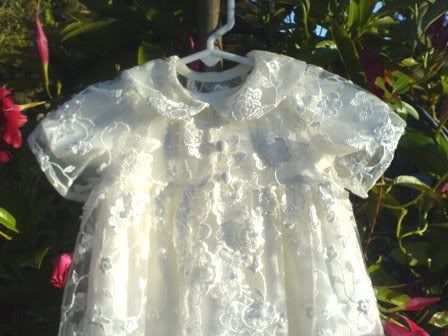
I added the small touch of lace, sans beading to the dress to make it tie together nicely. The edging on the lace jacket was from the lace overlay of the dress, but had to be all reattached by hand as part of the process.


The buttons on the jacket were from the dress as well. Rather than sew in buttonholes on the lace, I used ribbon for loops. The back of the dress buttons as well, but with new, flat buttons, for comfort.


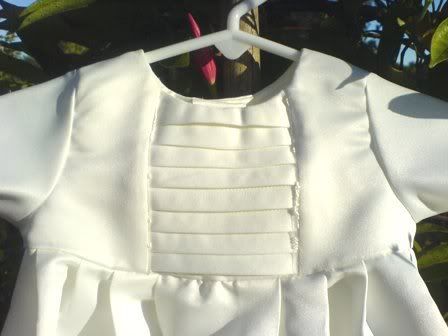
The horizontal tucking was a detail straight from a ready-made dress that my friend liked. It didn't turn out as neat as I wished it had, but that fabric was a pain, and I'm the only one who notices the flaws, I'm sure. It doesn't show up that well in the photo, but there are vertical inserts of the lace to either side of the tucks for another little touch.


This was another project that I was very proud to have accomplished. It's not as fine as many handmade Christening gowns, but it's a lot more special than something store bought. And it gave me the opportunity to try some things that I'd never attempted before.