Monday, November 30, 2009

I realized, that despite my initial intentions, I haven't posted anything here in awhile. That's only because I haven't actually finished anything in awhile.

I finished my polka-dotted dress this weekend, though of course, it's a lightweight rayon dress and we just had a cold front come through. I can wear it with tights and a sweater and it will look okay, but it's still a bit chilly for that here. So photos of that will be forthcoming.

Here are a couple of blocks completed for a quilt block swap in the last couple of months.


My woven ribbon star.


And an Arkansas Crossroads.


I've got one project in the making right now, a Christmas gift, that is exciting, but leaves my entire sewing area a mess with fabric and little pattern pieces. Here's a very poor preview photo.

Monday, October 26, 2009

vampire bats and evil woopie cushions

Auntie Caroline was responsible for Halloween this year. My first time!

My oldest nephew wanted to reuse the costume I purchased for my dad last year. My dad, my now 57 year old father, laughingly wore the Woopie Cushion costume I bought for him last year. All the people at the Fall Fest at the community center in teen-einsy town, TX loved it. My nephew decided that he didn't want to be just a Woopie Cushion, but an evil one.


So we took the store bought costume and added cut outs of bats and jack-o-lanterns and tombstones.


All you get are action shots of this one because he's 8. One of the jack-o-lanterns has what he called "hippie teeth." He meant "hillbilly" which made for a fun conversation.


The younger nephew went for Vampire Bat.


A hooded sweatshirt, some cheap satin and fuzzy material, some bias tape, dowels and Peltex. Voila! Vampire bats have very big ears.

The 6 year old is only slightly more compliant about having his photo taken.


Except when there are Hulk hands.

Tuesday, October 13, 2009

ikea bag

So I bought this awesome fabric at IKEA on the trip to buy organizational supplies for the sewing area. Yeah, you go to buy things to organize your fabric stash and you buy things to increase the stash itself. I know it's a common tale.

Anyway, I had a couple of yards of this amazing fabric and wasn't sure what to do with it. One day, browsing through some other websites, it hit me. A giant bag!

I was inspired by some Amy Butler patterns for giant tote bags, namely the Betty Shopper. But I've heard about Amy Butler patterns and was a little afraid. That, and I read some reviews that had issues with the fact that such a giant bag had such a small opening. I decided that I would take some of the things I loved about that bag and find another shape.

I browsed through patterns from the Big 4 and came upon one of Vogue's that I liked. I blew the pattern up, changed the height to width proportions a bit, added in some piping and some grommets, and voila!


Wednesday, October 7, 2009

an unveiling

So I've been undertaking a bunch of projects around the apartment lately, sprucing up the place, making it look nicer and function better. It's some sort of metaphor for the rest of my life. Or something like that.

I finished the 7 year old upholstery project, I've done some minor organization, I've made a commitment to keeping things cleaner. I've done a lot of purging.

One big project that I've been wanting to tackle for awhile was making my sewing area less of a mess.


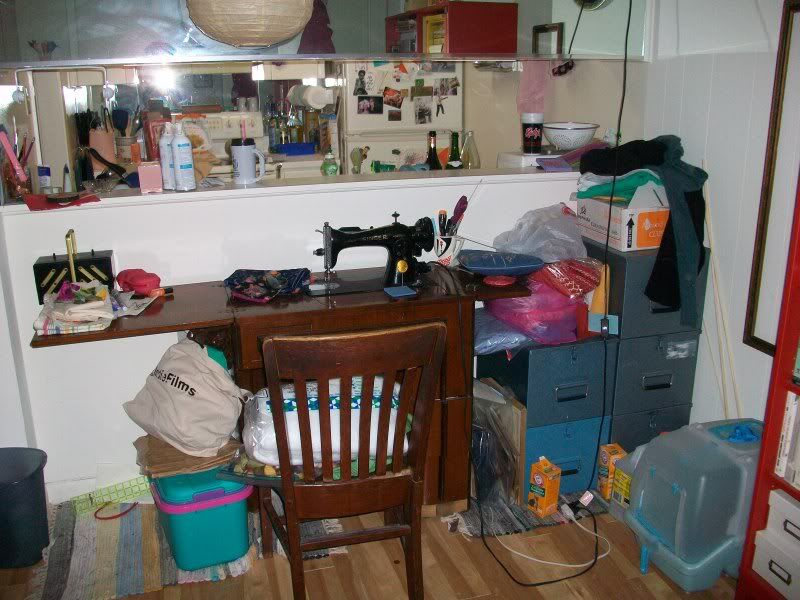
This was the before. You can see my issues. Those blue bins are great--tough and stackable and they were free. But, they were big and cumbersome and not terribly attractive. I was bad about putting things away and even purging, because it was such a hassle to get into them. Trust me that not even having them on a shelf helped. I tried that for awhile.

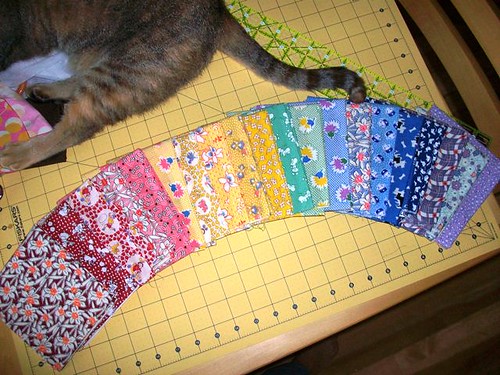
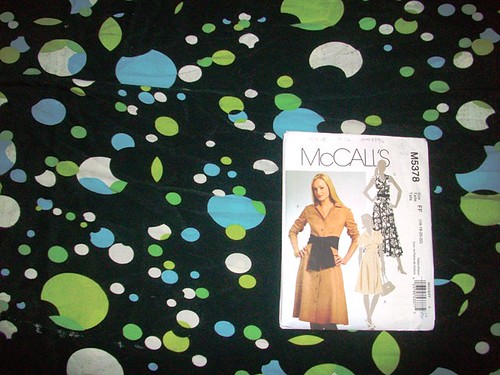
I've also been expanding my fabric collection a lot lately and was tapped out of space--hence the cardboard boxes and bags stuffed with stuff.

Living in a small apartment really made all this worse too, it's not like I have a separate sewing room. This is right in front of my front door. It's my living/dining/crafting/reading room, with a view into the kitchen.

So it became a big thing for me to undertake a project to not only organize the stuff more efficiently, but also make it more attractive.

I got Heather roped into helping me and we spent several hours on the project one day--assessing the situation, spending a bunch of money at IKEA and then assembling and organizing. My dad came over this weekend and helped me hang some wall shelves and get the whole thing finished.

I'm totally in love with the result.


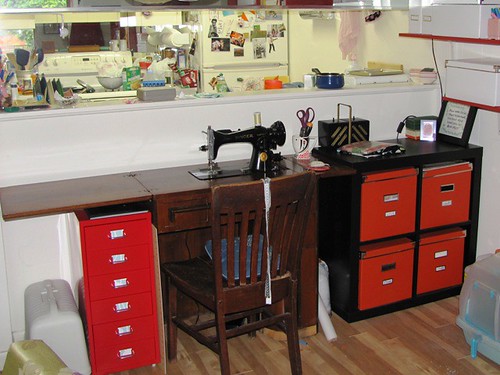
Look at the big expanse of empty flat surfaces!

Ignore the messy kitchen in the background--I've got to work on keeping those counters cleared. My apartment is, well, not minimally decorated. It's busy. It's cozy and charming and I like it. But it gets overwhelming sometimes and this re-do helped immensely to calm down this little corner of my world.

Plus, it's nice and functional. The red drawer unit holds smaller cross-stitch and embroidery supplies and smaller sewing supplies and notions. The orange bins hold the larger cuts of fabric. So far, I've been good about putting everything back where it goes too. Who knew? Judging by the saucepan on the bar, I've still got to practice. I don't know why that got put there. I'm better with my sewing equipment, I promise.


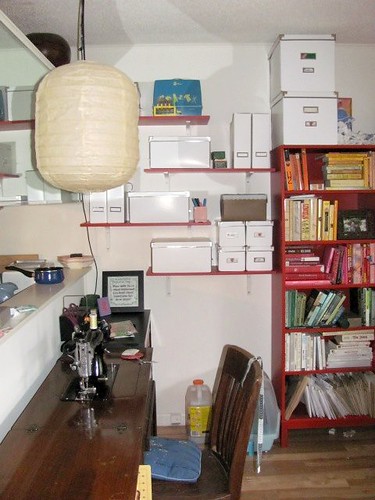
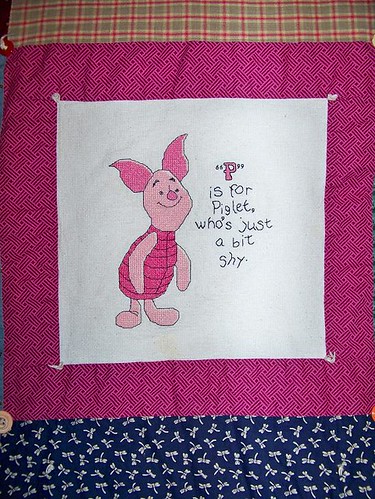
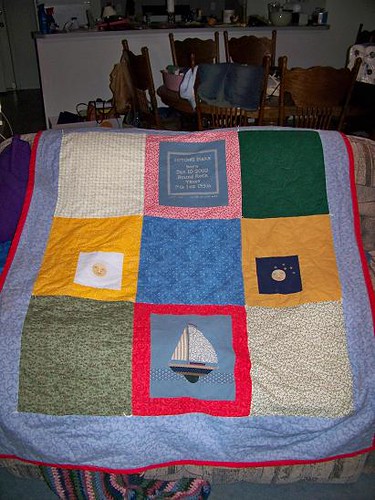
The smaller white bins on the wall hold ribbons and other notions. The medium bins hold smaller cuts of fabrics and the big white bins on top of the bookcase hold bigger cross-stitch supplies and some fabrics dedicated to a couple of specific quilting projects.

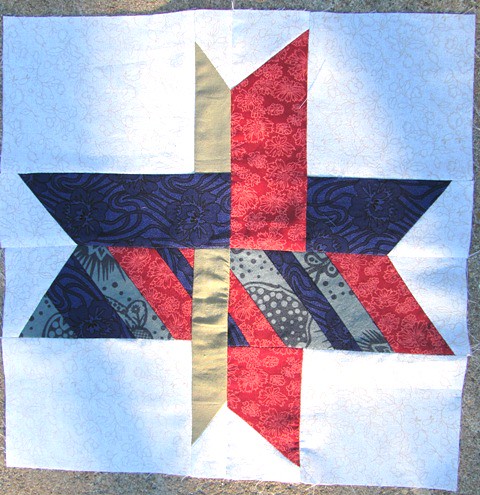
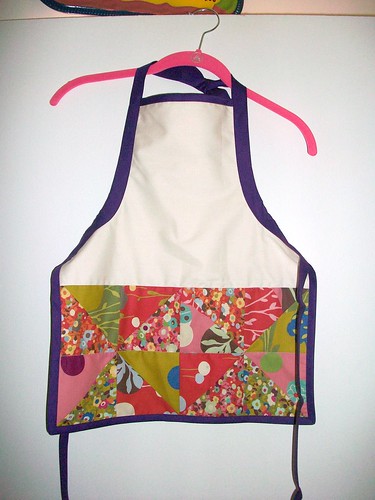
I haven't had a chance to sit down and sew since the shelves got finished, though I hope to finish up my giant piped tote bag this evening. There's a teaser for you!

Tuesday, October 6, 2009

Note to self:

Find/Devise pattern for top like this


Great 1920s style. I think I have the perfect vintage silk now that I think about it. Hmm.


This reminds me that I keep meaning to try some pattern, any pattern, from Decades of Style.

Too many ideas, too little time.

Thursday, October 1, 2009

work in progress


The bodice of my polka-dot shirt dress. The fabric, as predicted, is a pain in the butt. It's very slippery and it doesn't care that it's supposed to have a grain. There are lots of imperfections in the construction. But, it's also very forgiving, and I'll be the only one that knows what those are! I love how it's turning out!

Wednesday, September 30, 2009

pin cushion!

You saw the block in its state post machine work, here's how the rest of the project went.


After sewing down all the triangles.


You can't see it in this view, but I left one edge of the cube open, for stuffing and for ease of manuevering with the hand-sewing.


This is what it looked like once I started pinning and stitching down the window panes.


Ready for stuffing!


Stuffed and ready for stitching.


I closed up that opening with a running stitch and then put the last window pane in. Through the process, I realized that it might have not been too difficult to have done all the initial machine joins but one, stuffed the cube, and then machine-stitched the last opening closed. Doing the hand stitching on the stuffed cube wouldn't have been quite as easy as on the unstuffed cube, but it wouldn't have been that much extra effort.


The finished product!


So it's actually quite big for a pincushion. And I do worry that going through so many layers of fabric will dull the straight pins. I might end up using it as a 'thing' purely for decoration rather than as a pincushion, but we'll see. Mainly, I wanted to see how a cathedral window cube would go. I like it. Sometimes success is easy!

Monday, September 28, 2009

excuse the cat butt

I spend many a Saturday in the spring and fall months helping my parents set up shop at small town festivals. They have a nursery, of the plant variety, and though plants are not often when you find at fests, it's a good way to not only make money, but advertise. They always insist on paying me for my time, though I always tell them they don't need to and that I would do it out of the goodness of my heart. I not only love my parents, I like them and I enjoy the time I get to spend hanging out with them.

This past weekend, I had joked that for the first time, I would not only accept pay without arguing, but that I would request it in quarters, for laundry. As it turns out, I took my pay in fat quarters. Ha! I just thought of that just now and am exceedingly proud of the corny joke. I'll share it with my dad later as he's the one that taught me the art of the corny joke.

In any case, Dad took a look around after we got all the plants arranged and came back telling me about a booth that had quilting stuff for sale. He actually described it as, "You know, material, like this folded (hand gesture of size), you know, uh, fabric. Fabric!" I surmised that he meant fat quarters from his hand gestures, but assumed that the fabric wouldn't be anything much interesting--there is occasionally someone selling fabric alongside their crafts at these things and it's generally cheap cotton of non-interesting designs. I said I'd go look but wasn't too hopeful.

So, imagine my surprise when I did walk over later and noticed quite a few Aunt Grace patterns laying on the table. When the woman behind the table told me that the fat quarters were only $1 each, I told her I'd be right back. I also told Dad that $20 would be more than enough money when I asked for some cash. Only one of those statements was true. I could have spent $40.


So much pretty!


(And yes, excuse the cat butt, Sissie was intent on 'helping' me sew yesterday. She makes a great paperweight.)

Thursday, September 24, 2009

a thing in process

So I have this habit wherein I get into the middle of a sewing project and feel like I can't work on anything else until that one is done. I have all the pieces cut out for that wacky polka-dotted shirt dress but didn't feel like actually sewing it last night--the fabric is a slippery rayon which will no fun. It will be worth it in the end, but it will be a pain in the butt to get to the end. Since I have those pieces ready to go though, I feel like that's what I should be working on and so I generally don't allow myself any other projects. It's a habit that I need to get out of judging by the number of projects on my to-do list. It wouldn't be the best idea to start another piece of clothing, but why not smaller things?

So, after washing dishes and doing some vacuuming and sweeping last night, I threw this together.


It's not done yet, I hope you realize that. When it is done, it will be a block/pin cushion made out of cathedral window squares. I'm looking forward to seeing how it turns out--the window panes, in a dark brown, will wrap the edges of the squares, which I think would seem unexpected to most people.

Monday, September 21, 2009

7 years in the making

This project literally took me nearly 7 years. It's one of those things where you're afraid to try it, but then once you do, you want to smack yourself upside the head because it was ridiculously easy, you just had to sit down and do it.

When I first moved to Atlanta in August of 2002, I had a very post-college hodge-podge of furniture. I had two chairs in the living room, one of which was something I inherited from a friend who got it in her post-college years from another friend. I wanted a sofa but needed something cheap and flexible for small apartments. I felt lucky when I found this cute little rattan set.

Except that the cushions were covered in an ugly 1960s print barkcloth. I don't have a photo--it wasn't even worth documenting. There wasn't even a bit of kitchsy cuteness, they were just ugly. I thought to myself, oh, I can make new cushions, no problem! Foam and nice fabric are expensive of course, so I figured I would just cover the ugly cushions in something cheap until I could afford to do the real project. So I bought some clearance sheets.


The sofas sat in this state for 6 years, including through a move from Atlanta to Austin. 6 years. I could never decide on fabric, I was too intimidated by the whole thing, etc.

Finally, I told myself I just needed to do it. I did the bottom cushion about a year ago. I discovered that, since I cut out things like piping (which would be nice but perhaps a bigger challenge than necessary on a $60 sofa), it was really pretty easy and didn't take much time at all to do. But it still took me a year to get around to doing the back cushions.

I finally finished those this weekend, along with new throw pillows*, and even hand repair work to my vintage throw pillows!


*The throw pillows are a garage sale find velvet on one side and the same satin finish home dec polyester on the reverse. I only had enough velvet to do one side for each of 4 pillows. Sewing together velvet and a heavy satin finish fabric is not fun, let me tell you that. Pain in the rear. But it's great to have the project finally done. Now I can move onto another of those things that I've been procrastinating on.

Tuesday, September 8, 2009

inspired by heather

Some oldies, but goodies that I was inspired to post after reading Heather's post about a ring-bearer pillow.

It was interesting that in a fairly short period of time after moving back to Austin, I got asked to do two projects that involved cutting apart a wedding dress. I admit it, there's something satisfying in that for the perpetually single gal. But they were great challenges too.

The wedding dress dated to the early 1980s and wasn't made out of the nicest of polyester satins. We worked up a plan that consisted of purchasing new silk satin for the base fabric of the pillow, and layering that with the sheer overlay fabric from the dress and artfully arranging lace details from the train.


The lace, of course, was all hand-stitched down, with the addition of the decorative ribbons to make the tie ribbons not stick out quite so much.


This lace was the edging off the train and incorporated just into the holder of the pillow. I was pretty touched to be asked to work on this project and was very pleased with the outcome.


Sometime after that, one of my college roommates asked me about making a Christening Gown for her using her wedding dress. This gown was another with a satin base under a lace overlayer. The idea behind the basic design was to have a satin dress that wasn't too frilly, with a lace coat that could be worn over it. Their first child is a girl, but anticipating possible future boys in the family, she wanted something that could be used for all the children without being overly gender-oriented either way.


My friend shared with me links for newly made gowns that she liked and so between those, a Simplicity pattern and my mom's Martha Pullen book (we used to watch her PBS show religiously and drool over the antique laces), I cobbled together this pattern.


It was a challenge. As big as a wedding dress skirt may seem, it's not that big when you're trying to make a long, very full skirt for a Christening gown. I went through a very experimental muslin process to ensure that I had enough satin to get some fullness. I opted for the pleats rather than the gathering to meet that gender-neutral feel, but also because the satin was thick and wouldn't have cooperated that well with gathering.


I added the small touch of lace, sans beading to the dress to make it tie together nicely. The edging on the lace jacket was from the lace overlay of the dress, but had to be all reattached by hand as part of the process.


The buttons on the jacket were from the dress as well. Rather than sew in buttonholes on the lace, I used ribbon for loops. The back of the dress buttons as well, but with new, flat buttons, for comfort.


The horizontal tucking was a detail straight from a ready-made dress that my friend liked. It didn't turn out as neat as I wished it had, but that fabric was a pain, and I'm the only one who notices the flaws, I'm sure. It doesn't show up that well in the photo, but there are vertical inserts of the lace to either side of the tucks for another little touch.


This was another project that I was very proud to have accomplished. It's not as fine as many handmade Christening gowns, but it's a lot more special than something store bought. And it gave me the opportunity to try some things that I'd never attempted before.

Monday, August 17, 2009

No crafting photos to share as I spent most of my weekend reorganizing my closet. I'm doing all this in preparation, gearing up for, re-organization of my crafting corner. That's a scary prospect really.

Organizing my vintage handbag collection, however, was quite fun.


Tuesday, August 11, 2009

my new obsession

My most recently finished project:


There are something like 140 French knots in this thing--the coals, the flowers, all the upholstery details. I hate French knots, but I have a good technique going now. I just need to work on my camera settings for better shots of my projects...

This is from a crewel work kit dating to 1981. I bought off the used books/supplies table at the Waco Quilt Guild's quilt show. I believe I paid all of a dime. It was untouched and took me only a few weeks of work to stitch it up. I don't do a lot of embroidery of this type, but now am a total convert--big thread and big stitches means that the project goes quick, quick, quick!

I have been on a bit of a rampage buying vintage kits on ebay and etsy. I probably have enough now to last me til 2011. But I might still buy more.


Here's the next one that I'm tackling:


I started it just hours after finishing the old man and his cats. This one uses typical embroidery floss rather than wool yarn, but I think it will still be quick.
It's an older kit though, dating to the 1940s rather than the 70s or 80s. It's so old that even the photo of the finished project is in black and white. The final appearance of everything will be a surprise!


It came in its original box, with a frame complete with glass and matboard and all. It was missing one color of floss, but that's easily fixed. All that for $10 on ebay.
I don't know just what I'll do with all these when I get them finished.
And because I know you're wondering what that wacky bit of background you see in the above photos is...


My next sewing project! A crazy polka-dot shirt dress (knee length, short sleeves). The fabric is a rayon that I got from Fashion Fabric Club. It's not a nice smooth soft rayon, but it's still got a wonderful drape to it and should make for a fun dress. I've done this pattern once before and had the dress pretty much finished in a weekend, so it will be a quick project once I get around to cutting it out.


Monday, July 27, 2009

I've made a couple of skirts lately. It's starting small, but after months of not being able to finish a garment, it's a good start. And satisfying, because it's all cute!

However, one of the plights of the single seamtress is being able to take photos to show off new work.

Hence, my stop-light photo in the puddingmobile this morning.


Behold the hot-pink woodgrain skirt in all of its glory!


It's a simple a-line, with center front and back seams and pockets. Cause a modern gal needs pockets. It's the woodgrain print from Joel Dewberry, purchased on etsy a few weeks ago because I never bought it when it first came out.

I didn't take any photos during the process--I should start that--so you'll have to listen to get the goods. The fabric is a nice lightweight quilting cotton. I like light and flowy skirts sometimes, but I think prefer them to have a bit of weight to them, for structure. So I underlined this one with plain Kona cotton muslin. I should really share a photo of the back because I managed to throw in an invisible zipper on the first try with no problems through the two layers of fabric. I'm pretty damn proud of myself for that one (tip for other sewists--I actually think that invisible zippers are a LOT easier to put in than a regular zipper).

So that's the wacky hot-pink woodgrain skirt that I've been dreaming about for months.

I'll try to capture the pretty minty green skirt next. That one is even better because it has pockets and NO zipper!

Friday, June 26, 2009

some oldies but goodies

One thing that I would like to do here, as I sporadically post, is document some older projects.

These are my first two "quilts," made for each of my nephews when they were born. I actually realized that I had never really documented either of these anywhere and really wanted to do that for posterity's sake. I call them "quilts" because the quilting techniques here are minimal.

I've been a cross-stitcher since elementary school and that has been my primary means of gift-giving for a long time. I started to look for something for my older nephew, Reece, well, before he was actually born. I found the pattern book for Winnie the Pooh themed cross-stitch and it led to the idea of making a quilt out of the cross-stitched blocks.


You can see what I mean by minimal quilting techniques--solid blocks pieced together, sewn right-sides together and turned, and then tied. But all that cross-stitching sure took awhile.


So when I began to work on Mitchell's quilt, I had problems finding some cross-stitch patterns that really excited me. I finally happened upon this lovely boat themed book, but I felt bad because I wasn't going to be doing as much actual cross-stitching on his as on Mitchell's. But I loved the alphabet boat sail SO much.


So I said to heck with it. I actually did some hand-quilting on this one, just in the large solid blocks, to kind of liven it up. And I assembled in a more traditional manner with a binding.
I made sure when I gave them, to tell my sister that they were to be used. You can see the stains and know that they are. And they're loved. Mitchell actually asked me a couple of weeks ago if I would make him another blanket--this time with Spiderman on it. I said that I have lots of other people to make blankets for first because they never got one from me. Plus, I don't know how to make Spiderman. I think that will hold him off for awhile.

Wednesday, June 17, 2009

I love Dress a Day. I would wear a dress a day (or at least a skirt) if I didn't have a quickly growing forest on my legs. And I'll never be one of those women that can't shave. Unfortunately I inherited my dad's hair genes rather than my mom's. Well, hopefully not all his hair genes, because I would not look attractive with a giant gleaming forehead...

In any case, Erin at Dress a Day posted a link one day to this gorgeous vintage number on Ebay.
Out of my price range, and too small anyway.

But it brings to mind this Vogue pattern:


I bought this pattern when I first saw it, perhaps on Dress a Day... and have been hoping to magically one day find a 1" stripe fabric to use on it. Gingham is the obvious choice here, but I already have a dress in a large gingham--the Butterick walk-away dress--and I really don't know that I need two gingham dresses in my wardrobe. That idea may get the better of me one day when I get tired of waiting for the 1" stripe though.


Tuesday, June 16, 2009

an exercise in spinsterdom

So sometime in the last few months I joined the local quilt guild with my crafty friend Heather. The timing of that was quite serendipitous as it was just in time for their biannual weekend of quilting classes.

There's nothing quite like adopting a cat and joining a quilt guild to make a single 30 year old feel so spinstery, but here I am. And even better, I decided I'd combine the two and make my first ever machine quilted project for my cat.


This was done following the basic pattern that our (fabulous) teacher gave us. It's interesting actually to see how different such a basic piecing pattern can turn out based on the use of fabrics. 15 quilts in the same class, made following the same directions and they're all totally different.

My inspiration for the birds came from the IKEA fabric that I used for the back. I bought this fabric to hang on a canvas on the wall in my apartment--a project that has yet to be completed--and had enough leftovers for the quilt. On my trip through the local quilting shop, I got a little bird happy, but I was pleased with the composition on the front.


The actual quilting was another story. I was using my new-to-me Morse machine for pretty much the first time without really giving it much of a test run. Tension problems galore! Oh, and the presser foot pressure issues, even with the walking foot... notice how some of my squares turned into diamonds, rhombuses (rhombi?)? The stitching in the ditch was an exercise in frusteration. I need to work more on that and figure out the quirks of the machine.


The free-motion quilting was still frusterating, but also quite humourous. This was my first time ever trying free-motion quilting. Ever! And it shows. My circles are all not-quite circular. And my curves aren't quite smooth. I did the first bit in class on the Morse which actually, despite the walking-foot challenges, worked quite well. I finished it at home on my old Singer, which did not work so well. It's a much faster machine and my shapes got even wonkier and my stitches way too small.
I tried the feathering, as our teacher had encouraged in class and it turned out okay, though I clearly need practice there. The stitches don't look so bad in photo here, but up-close it just makes me laugh. I suppose that's the best I could ask for.

Oh, and the cat likes it.

Monday, June 15, 2009

not entirely a sewing project

My friend's daughter is turning 2 this week. My friend, V, has been looking for a play kitchen for this occasion--but not just any play kitchen, an old school wooden one. When you're dealing with a budget, I guess those are not easy to come across. What she found however, were instructions for an IKEA hack to turn a little side table thingy into a sink/stove combo piece.

So we spent Saturday honing our woodworking skills.

Or really, V honed her woodworking skills, while I honed my wood holding skills. I'm afraid of power saws.


So what you see on the left, is the end table, with a hole cut in it for the stainless steel bowl 'sink', fabric circles glued down for the 'burners', cabinet handles for the 'knobs', and some 1/4" plywood for the 'oven' door. The feet are wall/shelf brackets and all that is attached to the thicker plywood backing with a dishdrainer for a shelf.

The 'fridge' is a toy chest that we painted, put some hinges on and put on brackets of its own. There are a couple of shelves inside as well, just more thin plywood on glued on wood cleats.

We decided we were done with woodworking when it got to the decision about making a door for the under-sink cabinet. I offered to whip-up a quick curtain.


(I'll share a photo once it's actually in place.)


I had already decided to make an apron for my individual contribution for the birthday girl. I started that with pieces from a Moda charm pack that I picked up a quilt show a few weeks ago.


I took the charm squares and just cut them on the diagonal and started playing around, arranging them into something pleasing to the eye--my eye anyway. I used some wrapping paper to trace out a pattern for the apron shape and cut two of those out of muslin, making one side shorter than the other. I sewed the charm square patch to the bottom of the short muslin piece, sandwiched the two together, did some basic stitcing-in-the-ditch over the patched part and edged the whole thing with bias tape. I think it's going to fit funny for now, but it will be something that the 2 year old can grow into too.
When it came time to do the curtain, I cut some of the other charm squares in half and patched them together. Some quick seams, some leftover bias tape and that was about a 30 minute project.